In my previous post, I built an Active Directory environment with 500+ users across 26 organizational units - modeled after a university with different schools and departments.
Building that structure was step one. But an organized AD environment without Group Policy doesn’t actually do much outside of authenticating users.
That’s what this post is about: taking that AD structure and using it to implement real security policies. I configured 10 different Group Policies covering everything from domain-wide password requirements to locking down public computer labs.
The reason I structured the AD the way I did was specifically for this - different OUs need different security policies. Faculty handles student data that needs protection. IT staff needs administrative tools. Computer labs are shared spaces with high malware risk. Each OU gets targeted policies based on its actual security requirements.
I’ll walk through the policies I implemented, why I configured them the way I did, and the lessons I learned along the way that weren’t as intuitive as I hoped. Things like why drive mappings silently fail if folders don’t exist, or why some policies need a reboot versus just running gpupdate.
This isn’t a step-by-step tutorial - there are plenty of those already. Instead, I’m documenting the thinking behind each policy decision and the practical lessons from actually implementing them in a realistic environment.
The Lab Environment
Quick recap of what I’m working with, since the AD structure directly impacts how these policies get applied.
I’ve got a Windows Server 2022 domain controller running this homelab.local domain with a realistic university organizational structure:
University
├── Staff
│   ├── IT Services
│   ├── Human Resources
│   ├── Facilities & Maintenance
│   ├── Library Services
│   ├── Administrative Services
│   └── Academic Services
├── Faculty
│   ├── School of Engineering
│   │   └── Computer Science
│   ├── College of Arts & Sciences
│   │   ├── English Department
│   │   └── Mathematics Department
│   └── School of Business
├── Computers
│   ├── Faculty Workstations
│   ├── Staff Workstations
│   ├── Computer Labs
│   └── Servers
├── Groups
│   ├── Staff Groups
│   ├── Faculty Groups
│   └── Resource Access Groups
└── Service Accounts
All told, 26 organizational units with 500+ user accounts with realistic names, departments, and titles. I also created 16 security groups for things like “All-Faculty,” “IT-Admins,” “Department-Chairs,” and resource access groups.
The client side is a Windows 10 Enterprise VM that I can move between OUs to test different policies. This matters - I need to test policies as Faculty users, IT users, and Students to see how the restrictions actually apply.
The Security Strategy

Figure: Group Policy Objects applied to OU’s
I organized the policies into three layers based on scope and risk level. The approach was: establish a domain-wide security baseline first, then add role-specific restrictions based on what each group actually needs to do their job.
Layer 1: Domain-Wide Foundation
These policies apply to everyone in the domain - Faculty, Staff, Students, IT, etc, and create a baseline for security.
Password Policy
This one’s straightforward but fundamental. I configured the Default Domain Policy with:
- 12 character minimum
- Complexity requirements enabled (uppercase, lowercase, numbers, special characters)
- 90 day maximum password age
- 1 day minimum age (prevents users from cycling through password history)
- 24 password history (can’t reuse last 24 passwords)
The reasoning: passwords are still the primary authentication method for most environments. Yeah, everyone hates password requirements, but a compromised account with a weak password is how most breaches start. The 1-day minimum is specifically to prevent people from changing their password 24 times in a row to get back to their original one - a very possible scenario.
Account Lockout Policy
Same GPO, configured:
- Lock account after 5 failed login attempts
- 30 minute lockout duration
- Reset counter after 30 minutes
This prevents brute force attacks. Someone trying to guess passwords will get 5 tries and then hit a wall. In production, you’d tune these numbers based on your environment - some places do 3 attempts, some do 10. I went with 5 as a reasonable middle ground. The 30 minute duration is long enough to slow down attackers but short enough that legitimate users who mistype their password aren’t locked out all day.
Audit Policy
I enabled auditing for:
- Account logon events (success and failure)
- Logon events (success and failure)
- Account management (success and failure)
- Directory service access (success and failure)
- Policy change (success and failure)
The “why” here is visibility. Without audit logging, you have no idea what’s happening in your environment. Failed logins tell you someone’s trying to access accounts they shouldn’t. Successful logins give you a timeline for incident investigation. Account management changes show you who’s creating/deleting users. Policy changes track who’s modifying GPOs.
I tested this by intentionally entering wrong passwords and then checking Event Viewer on the DC. Event ID 4625 showed up with the failed attempt, including which computer it came from and what account was targeted. That’s the kind of visibility you need when something goes wrong.
Layer 2: Role-Based Policies
This is where the OU structure really matters. Different roles have different security needs and different risk profiles.
Faculty Policies
Faculty members handle student data (grades, attendance records, etc) that require a certain level of data protection. I created policies linked to the Faculty OU that apply to all three schools underneath.
15-minute screen lock: Uses the “Interactive logon: Machine inactivity limit” setting. After 15 minutes idle, the session locks. This prevents someone from walking up to an unattended faculty computer and accessing student records. It’s longer than what I set for shared labs (5 minutes) but shorter than what most users would prefer, because the data sensitivity requires it.
USB storage restrictions: I blocked all removable storage using the Removable Storage Access policies. USB flash drives and external hard drives are disabled. Keyboards and mice still work because they’re a different device class.
I blocked USB devices to prevent the spread of malware if an infected drive was plugged in, and to make it more difficult for sensitive data to leave the site.
Folder redirection and drive mapping: This is about automatic backups and data protection. I set up folder redirection to point users’ Documents folders to network storage (\\DC01\UserData$\username\Documents) and mapped their H: drive to a personal home directory (\\DC01\HomeDirectories$\username).
The benefit is twofold: users’ important files are automatically saved to the server where they’re backed up, and they can access their files from any computer they log into. It’s transparent to the user - they just save to Documents like always, but behind the scenes it’s going to network storage.
The catch I ran into: the folders have to already exist. Group Policy doesn’t create them automatically. I had to manually create the folder structure for test users before I could get it to work.
In a production environment, I would write a PowerShell script to pre-create those home directories for all users.
IT Services Policies
IT staff need the opposite approach - minimal restrictions because they need access to administrative tools.
I created a policy linked to the IT Services OU that explicitly allows:
- Command Prompt access
- PowerShell execution
- Control Panel access
- No USB restrictions
The key here is that because this policy is linked to the IT Services OU only, restrictive policies linked elsewhere (like Faculty or Computer Labs) don’t affect them. This is where the OU separation really pays off - IT staff can do their jobs without fighting against security policies designed for regular users.
Standard Staff Policies
For non-IT staff departments (HR, Academic Services, Administrative Services, Library Services, Facilities), I created a middle-ground policy:
- 10-minute screen lock (tighter than Faculty because they handle more administrative data)
- Control Panel access blocked (they shouldn’t be changing system settings)
- Run menu removed from Start Menu (reduces attack surface)
This applies to most staff users who need to do their jobs but don’t need administrative access to their computers. It’s tighter than what Faculty gets but nowhere near as locked down as student computers.
HR & Academic Services - Maximum Data Protection
These two departments got extra restrictions because they handle the most sensitive data - HR has employee SSNs and salary information, Academic Services has student records and enrollment data.
I configured:
- All removable storage completely blocked (not just USB - everything)
- Folder redirection for Documents, Desktop, Downloads, AND Pictures (more aggressive than regular Faculty)
- Same 10-minute screen lock as other staff
The more sensitive the data you have access to, the more tighter restrictions are required. Multiple folders redirected means less chance of sensitive files sitting on local drives. Complete removable storage blocking means data can’t easily walk out the door.
Layer 3: Endpoint Hardening - Computer Labs
This is the big one. Computer labs are shared, public-facing computers with the highest risk profile:
- Students you don’t know using them
- Potential for malware from downloads or USB drives
- System configuration changes that require reimaging
- Privacy concerns (previous user’s data still accessible)
I created a policy linked to the Computer Labs OU with maximum lockdown:
Control Panel completely removed: Students shouldn’t be changing display settings, uninstalling software, or accessing system configuration.
Command Prompt and PowerShell disabled: Prevents students from running scripts, accessing system files, or trying to bypass other restrictions.
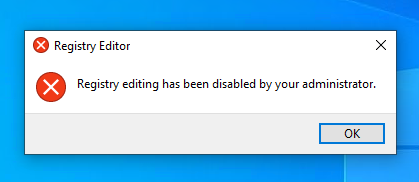
Registry Editor blocked: Same reasoning - students don’t need to modify the Windows registry.
Software Restriction Policies: I configured path rules to block execution of .exe, .msi, .bat, .vbs, and .ps1 files from the Downloads folder. Students can download files for their work, but they can’t execute them. This prevents “I downloaded this cool program from the internet” situations that end with malware.

Windows Update access removed: Students shouldn’t be triggering Windows updates in the middle of a class period. IT controls when lab computers update.
5-minute aggressive screen lock: Way tighter than anywhere else because these are shared computers. Student walks away for a few minutes, session needs to lock so the next person can’t access their stuff.
The result is a computer that students can use for legitimate schoolwork - Microsoft Office, web browsers, installed educational software - but can’t break, infect with malware, or use to compromise other systems.
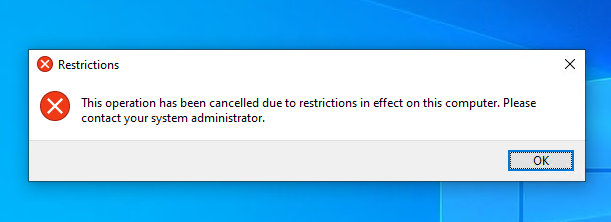
Testing this was actually pretty satisfying. I moved my Windows 10 client into the Computer Labs OU, rebooted it, and tried everything:
Control panel, command prompt, registry editor, and downloaded .exe files were all blocked.
Every restriction worked exactly as intended. It’s the kind of lockdown you’d actually see in university computer labs, library public computers, or any shared endpoint environment.
The Pattern That Emerged
Looking at all these policies together, the pattern became clear: risk-based security.
- Domain-wide policies establish the baseline (everyone gets strong passwords and audit logging)
- Role-based policies add restrictions based on data sensitivity (Faculty protects FERPA data, HR protects PII)
- Endpoint-based policies account for the environment (shared computers get maximum lockdown)
- Privilege-based policies allow flexibility where needed (IT gets tools, everyone else doesn’t)
This is how you’d actually implement GP in production. You don’t just randomly apply policies - you think about what each group does, what data they access, what tools they need, and what the risk profile is. Then you configure policies that protect the organization while letting people do their jobs.
Lessons Learned
Implementing these policies taught me several things that Microsoft documentation doesn’t really cover. These are the practical lessons that came from actually doing the work, not just reading about it.
OUs Are Not Security Groups
This was my first major confusion. I kept thinking “I want this policy to apply to all Faculty members, so I’ll target the All-Faculty security group.”
That’s not how Group Policy works.
GPOs link to Organizational Units, not groups. The policy applies to whatever user or computer objects physically exist in that OU. Security groups control resource permissions (who can access files, printers, etc.), not policy application.
I figured this out when I tried to create a drive mapping policy “for the All-Faculty group” and couldn’t find any way to target it. Eventually I realized: the policy needs to be linked to the Faculty OU, and it will apply to everyone in that OU hierarchy because they’re physically located there in Active Directory.
This changed how I thought about AD structure. The OU hierarchy isn’t just organizational - it’s your policy targeting mechanism.
Computer Configuration vs User Configuration
Some settings can go in either place, and I initially didn’t understand when to use which.
Computer Configuration settings apply to the computer itself, regardless of who logs in:
- Machine inactivity limits (screen lock)
- USB restrictions
- Windows Update settings
- Software installation
User Configuration settings apply to the user, regardless of which computer they log into:
- Drive mappings
- Folder redirection
- Desktop wallpaper
- Application settings
I made the mistake of putting screen lock timeout in User Configuration first. It didn’t work. Moved it to Computer Configuration under Security Options, and suddenly it worked fine.
The rule I eventually figured out: if it’s about the physical computer or system-level security, it’s Computer Configuration. If it’s about the user’s experience or their data, it’s User Configuration.
Policy Application Timing is Messy
This one frustrated me for a while. I’d configure a policy, run gpupdate /force on the client, and… nothing would happen. Or some things would work but others wouldn’t.
Here’s what I learned:
Computer Configuration policies typically require a reboot to take effect. You can run gpupdate /force but until you restart the computer, many settings won’t apply. This is especially true for USB restrictions, software restriction policies, and security settings.
User Configuration policies usually need you to log off and back on. Running gpupdate /force while staying logged in will apply some things but not others. Folder redirection, for example, only happens at logon.
Some policies are even more specific: Drive mappings need a fresh logon. Folder redirection not only needs a logon but also requires the target folders to already exist.
The practical lesson: when testing policies, my workflow became:
- Configure the policy on the DC
- On the client:
gpupdate /force - Reboot the client (not just log off/on)
- Log in as a test user
- Check if the policy applied
If I skipped the reboot step, I’d waste time troubleshooting policies that were actually configured correctly - they just hadn’t applied yet.
Drive Mapping Fails Silently
This one cost me about two hours of troubleshooting.
I configured a drive mapping policy for Faculty: map H: drive to \\DC01\HomeDirectories$\%username%. I tested it with a Faculty user, ran gpupdate /force, logged off and back on. No H: drive appeared.
I checked the GPO settings: correct. I checked the share permissions: correct. I ran gpresult /r to see applied policies: the GPO was listed as applied. But still no drive.
Finally I went to the DC and browsed to C:\HomeDirectories. The folder existed. But there was no subfolder for my test user (crwilson). The drive mapping was trying to connect to \\DC01\HomeDirectories$\crwilson, but that folder didn’t exist.
Group Policy doesn’t create folders automatically. It just tries to map to whatever path you specify. If the path doesn’t exist, the mapping silently fails with no error message to the user.
I manually created the folder, went back to the client, ran gpupdate /force, and the H: drive appeared instantly.
In production, you’d solve this with a PowerShell script that pre-creates home directories for all users with proper permissions. Or you’d use logon scripts to create folders on-demand. But the documentation doesn’t tell you this - it just assumes the folders exist.
Testing Methodology Matters
Early on, I’d configure a policy, test it with one user, see it work, and assume it was good. Then I’d test with a different user type and find it didn’t work the same way.
I learned to test systematically:
For each policy, test with:
- A user from the target OU (should apply)
- A user from a different OU (should NOT apply)
- An admin account (should I be exempt? depends on the policy)
- An IT Services user (typically should be exempt from restrictions)
This caught several issues where policies were applying too broadly or not applying where they should.
Also learned to check multiple ways:
- Does the policy show in
gpresult /r? (Is it being received?) - Does Event Viewer show any policy errors? (Did it fail to apply?)
- Does the restriction actually work? (Try to violate it)
- Can you still do legitimate work? (Did you block too much?)
More Policies Doesn’t Always Mean More Security
I initially went overboard creating separate GPOs for every little thing. “Faculty USB Restrictions,” “Faculty Screen Lock,” “Faculty Drive Mapping” - all separate policies.
That became a management nightmare. Too many policies linked to the same OU, harder to troubleshoot conflicts, unclear what was actually applying.
I consolidated: “Faculty - Security Settings” now contains screen lock, USB restrictions, and basic lockdown settings. “Faculty - Data Protection” contains folder redirection and drive mapping. Two policies instead of five, much easier to manage.
The lesson: group related settings into logical GPOs. Don’t create a new policy for every individual setting. Think about policies as “bundles of related configurations” not “one setting per GPO.”
Documentation is Your Friend
I started documenting every policy as I created it:
- What OU it’s linked to
- What it does
- Why I configured it that way
- Any dependencies (like folders needing to exist)
- Testing notes
This became invaluable when troubleshooting. “Wait, why isn’t this working? Let me check my notes… oh right, I need to reboot, not just log off.”
It’s also made writing this blog post way easier. I’m not trying to remember what I did three weeks ago - I have notes from when I did it.
In production, this would be even more critical. Six months from now, you won’t remember why you configured a specific setting. The next admin who inherits your environment definitely won’t know. Document as you go.
The Big Picture
The biggest thing I learned: Group Policy is powerful but has a lot of gotchas that aren’t obvious from reading documentation.
Things that seem like they should “just work” often don’t until you understand the underlying mechanics:
- Why Computer vs User Configuration matters
- How OU structure determines application
- When policies actually take effect
- What dependencies exist (folders, permissions, etc.)
- How to properly test and verify
That’s the value of actually building this stuff in a lab. You hit all those edge cases, learn the troubleshooting process, and build the mental model of how it all fits together. Reading about Group Policy teaches you the settings. Implementing Group Policy teaches you the system.
What’s Next
This completes the security foundation for my Active Directory environment. The policies are configured, tested, and documented. But there’s more to explore:
High availability: Adding a second domain controller to test replication, FSMO roles, and failover scenarios.
Advanced authentication: Implementing fine-grained password policies for different user tiers, exploring certificate-based authentication.
Automation: Building PowerShell scripts for user provisioning, home directory creation, and compliance reporting.
Disaster recovery: Testing AD backup/restore procedures, practicing DSRM recovery, documenting the process.
Each of these represents the next step in building enterprise-ready infrastructure. For now, I’ve got a solid foundation: a well-structured AD environment protected by comprehensive, role-based security policies.